1. Introduction
A Mindstorms Brick requires an environment to run a Java Virtual Machine. The software to install is:
-
Operating System
-
Java Virtual Machine
2. Operating System
An operating system (OS) is system software that manages computer hardware and software resources and provides common services for computer programs.
For LEGO Mindstorms ecosystem, EV3Dev is the best option for this purpose,
it provides a Debian image compatible with LEGO Mindsotorms EV3, BrickPi & Pistorms.
Debian is a Linux Operating System used in millions of computers on the world.
This project use Debian delivered by the project EV3Dev which provide a interface
to interact with Lego Mindstorms EV3 Brick and other boards compatible like BrickPi & PiStorms.
|
Debian is a stable project and it has released multiple versions.
EV3Dev supports the following versions:
-
Debian Jessie
-
Debian Stretch
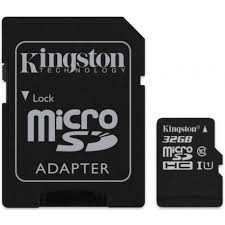
To install any Debian version, you will need to acquire a MicroSD Card to insert in the Brick.

2.1. Debian Stretch (EV3)
EV3Dev has an excellent step by step guide to install the Debian image in the Brick. Please, follow the link to install EV3Dev on your Brick
2.1.1. Increase the CPU
Read the following article to increase the EV3 CPU: https://lechnology.com/2018/06/overclocking-lego-mindstorms-ev3-part-2/
It is possible to increase the CPU from 300Mhz to 456Mhz. You will observe a great performance improvement when you run your Java programs or when you use Apt.
2.2. Debian Jessie (BrickPi+/BrickPi3/PiStorms)
If you have BrickPi or PiStorms, It is better if you use the classic Debian Jessie image at the moment.
2.3. Test the installation
Once you have finished the process to install the EV3Dev image on your Brick, try to establish a remote ssh connection.
Verify that your Brick has a connection in the same network than your computer
ssh robot@192.168.1.104And you should the following output
The authenticity of host '10.0.1.2 (10.0.1.2)' can't be established.
ECDSA key fingerprint is SHA256:21hHcnrpfwFMNaZcgeR9b5YnJw7q6Eojt0ZQM83Ephk.
Are you sure you want to continue connecting (yes/no)? yes
Warning: Permanently added '10.0.1.2' (ECDSA) to the list of known hosts.
robot@10.0.1.2's password:
             _____     _
   _____   _|___ /  __| | _____   __
  / _ \ \ / / |_ \ / _` |/ _ \ \ / /
 |  __/\ V / ___) | (_| |  __/\ V /
  \___| \_/ |____/ \__,_|\___| \_/

Debian jessie on LEGO MINDSTORMS EV3!

The programs included with the Debian GNU/Linux system are free software;
the exact distribution terms for each program are described in the
individual files in /usr/share/doc/*/copyright.

Debian GNU/Linux comes with ABSOLUTELY NO WARRANTY, to the extent
permitted by applicable law.
If you connected with your brick then you have completed this process and now you will have a Brick with a complete Linux distro to run any Programming language.
| Please, maintain your brick always updated. |
Execute the following commands before jump to the next step in this guide.
sudo apt-get update
sudo apt-get upgrade
sudo apt-get dist-upgrade
sudo reboot now
Now, you have Linux in your Brick!
3. Java Virtual Machine
Java programs need a JVM (Java Virtual Machine) installed in the Brick. Depending of the Hardware and the Debian version, you will have different options to install it.
3.1. EV3 Brick
For EV3, it is possible to install the following JVM:
-
Open JDK 11 for Debian
Using this project, the developer has 3 alternatives to install a JVM:
-
Manual
-
Using the project Installer
-
Using Gradle tasks from Template Project which interacts with Installer
3.1.1. Manual
You can download the last OpenJDK build for EV3 from AdoptOpenJDK CI
Using the terminal, execute the following statements on a remote connection session from your EV3 Brick to install OpenJDK on your brick.
wget -N https://ci.adoptopenjdk.net/view/ev3dev/job/openjdk11_build_ev3_linux/lastSuccessfulBuild/artifact/build/jri-ev3.tar.gz
sudo tar -zxvf jri-ev3.tar.gz -C /opt
mv /opt/jri-ev3/ /opt/jri-11
update-alternatives --install /usr/bin/java java /opt/jri-11/bin/java 1011
java -Xshare:dump
Now, you have Java on your EV3 Brick!
3.1.2. Installer
Using the terminal, execute the following statements on a remote connection session from your EV3 Brick to to execute the installer.
cd /home/robot
mkdir installer
cd installer
wget -N https://raw.githubusercontent.com/ev3dev-lang-java/installer/master/installer.sh
chmod +x installer.sh
sudo ./installer.sh help
sudo ./installer.sh java
3.1.3. Gradle Template project
The template project provides some Gradle tasks to interact with Installer project to install Java.
The available tasks:
-
getInstaller
-
installJava
-
javaVersion
3.2. BrickPi 3 / BrickPi+ / PiStorms
Bricks using Raspberry Pi hardware has more CPU/Memory capacity and it is possible to install from Debian Packages.
| The project only offer support for Debian Jessie at the moment. |
3.2.1. Debian Jessie
Manual
Using the terminal, execute the following statements on a remote connection session from your Brick to install Oracle JRE 8 on your brick.
apt-key adv --recv-key --keyserver keyserver.ubuntu.com EEA14886
echo "deb http://ppa.launchpad.net/webupd8team/java/ubuntu trusty main" | sudo tee -a /etc/apt/sources.list
echo "deb-src http://ppa.launchpad.net/webupd8team/java/ubuntu trusty main" | sudo tee -a /etc/apt/sources.list
sudo apt-get update
sudo apt-get install oracle-java8-installer
java -Xshare:dump
Installer
Using the terminal, execute the following statements on a remote connection session from your Brick to to execute the installer.
cd /home/robot
mkdir installer
cd installer
wget -N https://raw.githubusercontent.com/ev3dev-lang-java/installer/master/installer.sh
chmod +x installer.sh
sudo ./installer.sh help
sudo ./installer.sh java
Gradle Template project
The template project provides some Gradle tasks to interact with Installer project to install Java.
The available tasks:
-
getInstaller
-
installJava
-
javaVersion
3.3. Test your installation
Once you finish the JVM installation process, it is necessary to verify the installation. Execute the following statement to check that Java command is running in the right way.
java -versionNow, your Brick is ready to run your Java programs.
4. Next Step
Continue in the section about Create your first project